Translation cost is too expensive, so basically all WordPress translation plugins with multi-language SEO effect need to register extra translation API to realize the translation function. And Google Cloud Translate is the best quality translation service with the most voice support among free translations.
This article teaches you how to register free Google Translate API from scratch, as long as the registered API input TranslatePress and other translation plug-ins can realize the website fully automatic multi-language translation.
Google Cloud Platform Registration
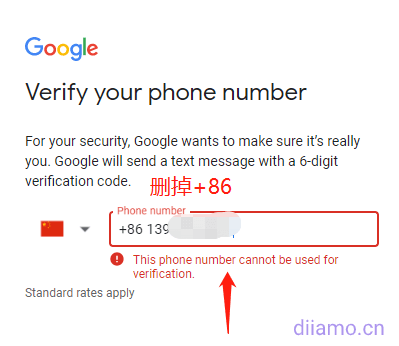
If you do not have a Google account to register a first, when you need to verify the cell phone number, select China directly after entering the cell phone number in front of do not put".+86". If you encounter "This phone number cannot be used for verification", change the main language of your browser to English, or use your cell phone to register instead.
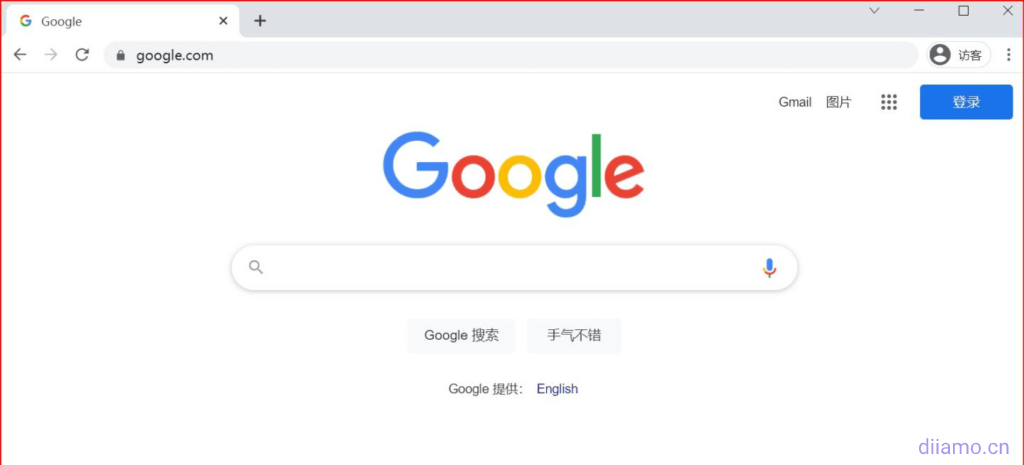
After signing up for an account or if you already have an account, you need to open the ladder software and then go to Google.com. Click on Sign In in the upper right corner to start signing into your Google account.
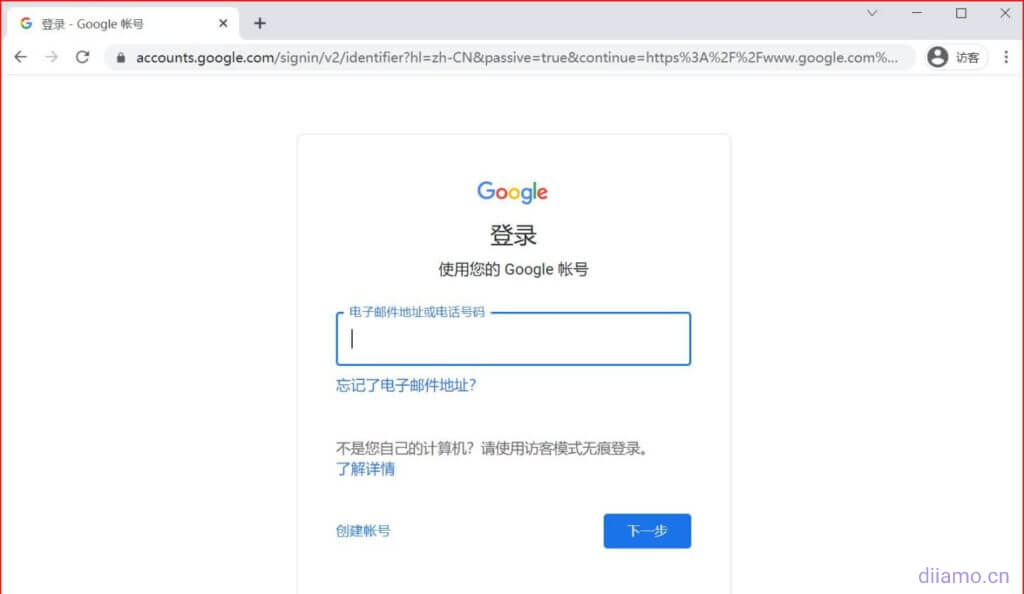
Enter your details to log in
If you have already signed in to your Google account, this step can be omitted and you can jump directly to the Google Cloud Google Cloud application page.
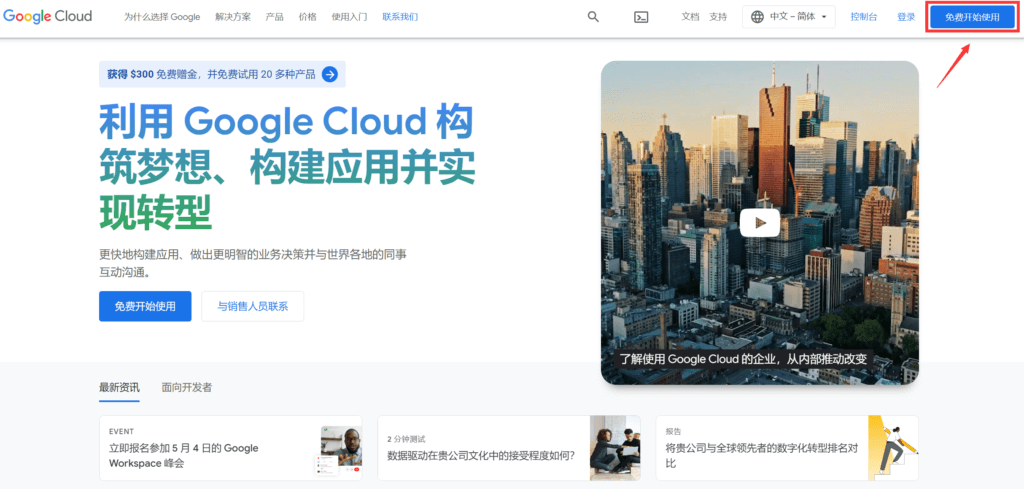
Visit the Google Cloud Google Cloud website.cloud.google.comSelect Chinese-Simplified for the website language and click the blue button.It's free to get started.
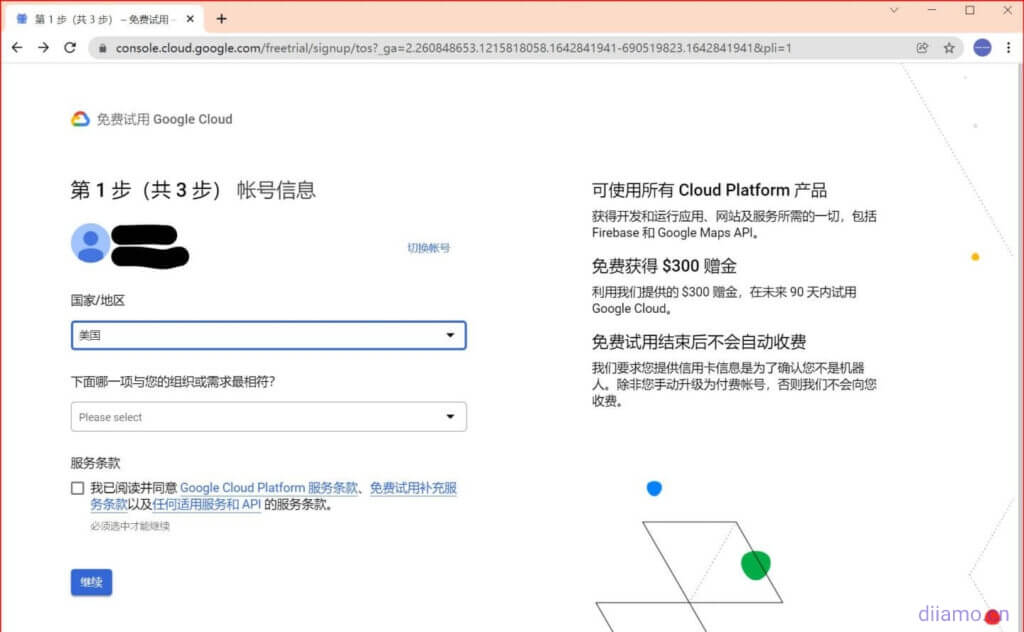
Here is the official entry to the free trial of Google Cloud application, there are three steps, the first step is to fill in the account information.
Google Cloud Application First Steps
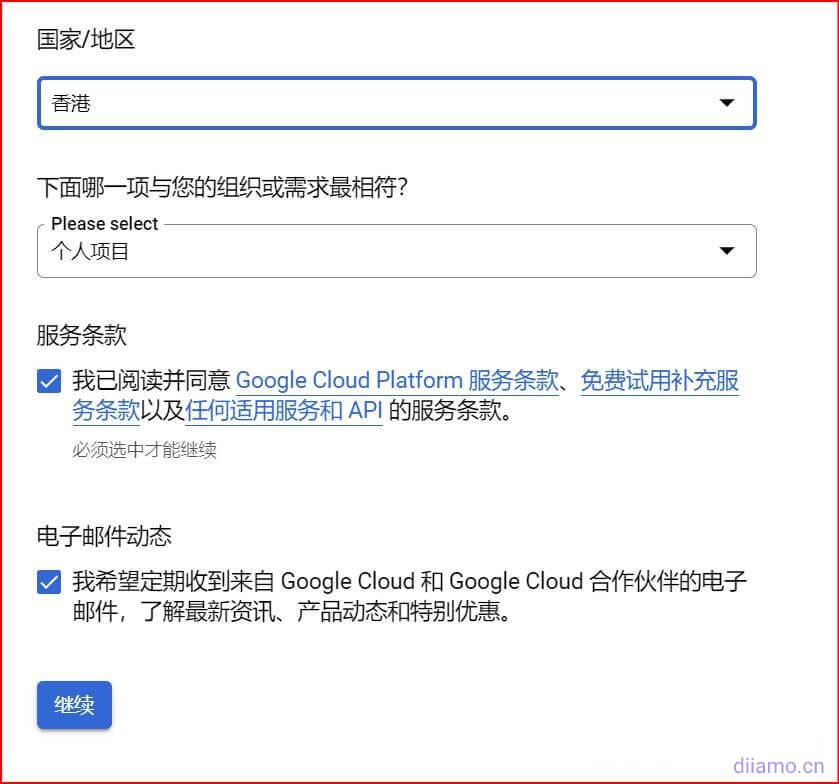
First fill in the country / region, here it is recommended to select the node IP location, for example, you use the United Kingdom agent, the country / region to choose the United Kingdom, the use of U.S. agents, the country / region to choose the United States (It is recommended to choose Hong Kong, as you need to fill in the credit card information later on).
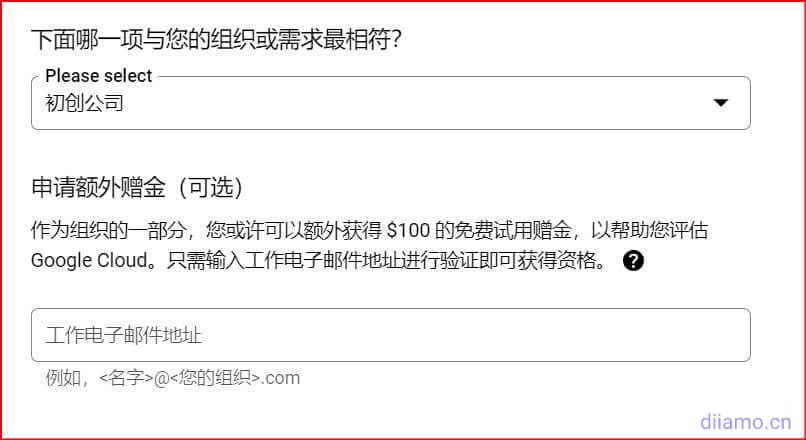
Once the country region is selected, choose which of the following best matches your organization or needs? This step also gives you an additional $$ $100 free trial (stacked on top of the $300) if you choose the company category, but you'll have to enter a corporate email.
This step allows you to select the Personal Project or Other category if you don't want to apply for an additional trial grant.
Once the above two choices are made, check the Terms of Service and Email Dynamics below and click Continue for step two.
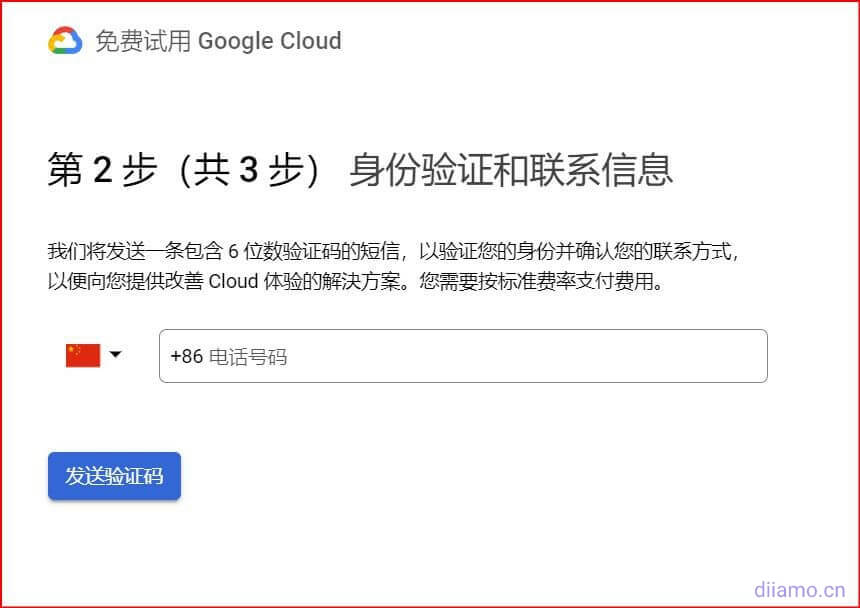
Step 2, Identity Verification and Contact Information, enter your phone number for post-identity verification contact information.Google will send a text message containing a 6-digit verification code to verify your identity and confirm your contact information in order to provide you with a solution to improve your Cloud experience.
You will need to pay the standard rate. At the flag icon in front of the phone number, click on the down arrow to pull down, select China +86 and fill in your domestic cell phone number at the phone number. After receiving the verification code, fill in to continue to the next step
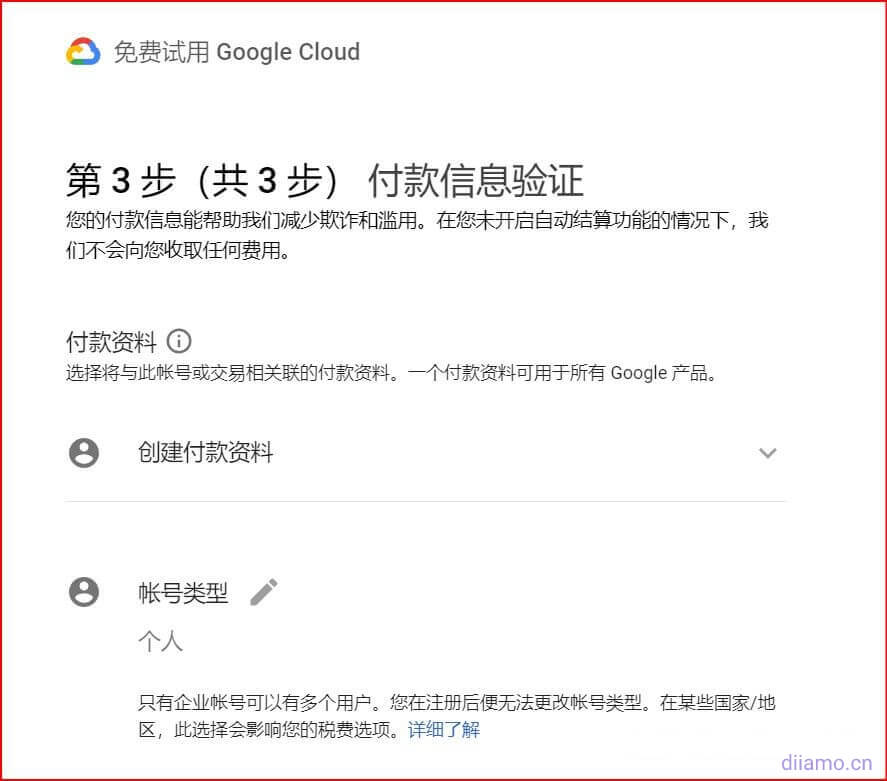
Step 3, Payment Information Verification. This step is the key to signing up for Google Cloud Google Cloud and requires verification of credit card information. Select Personal for the account type.
Once the account type is selected, you need to fill in the payment method, which means adding a credit or debit card. Enter the prepared credit card number, valid year and month, and CVV 3-digit security code. You can also add PayPal if you have one (Note: Google Cloud doesn't seem to support domestic PayPal).
Fill in the address field with a random billing address and zip code for the area in which you are registered. (The billing address will only be mailed to this address if charges are actually incurred and a paper bill is requested. The billing address can be found on Google Maps or obtained from a random address generator on the web.) Tax information is not required, click to start your free trial.
After you click to start the free trial, you'll get a text message or a transaction alert from your bank app. Google will charge your credit card $1 and then it will be returned immediately. Congratulations, Google Cloud Google Cloud has been applied successfully!
Note: The first time you use your credit card to make a transaction in US dollars, the bank's credit card center will have a risk control call to ask if the transaction was done in person, just answer yes.
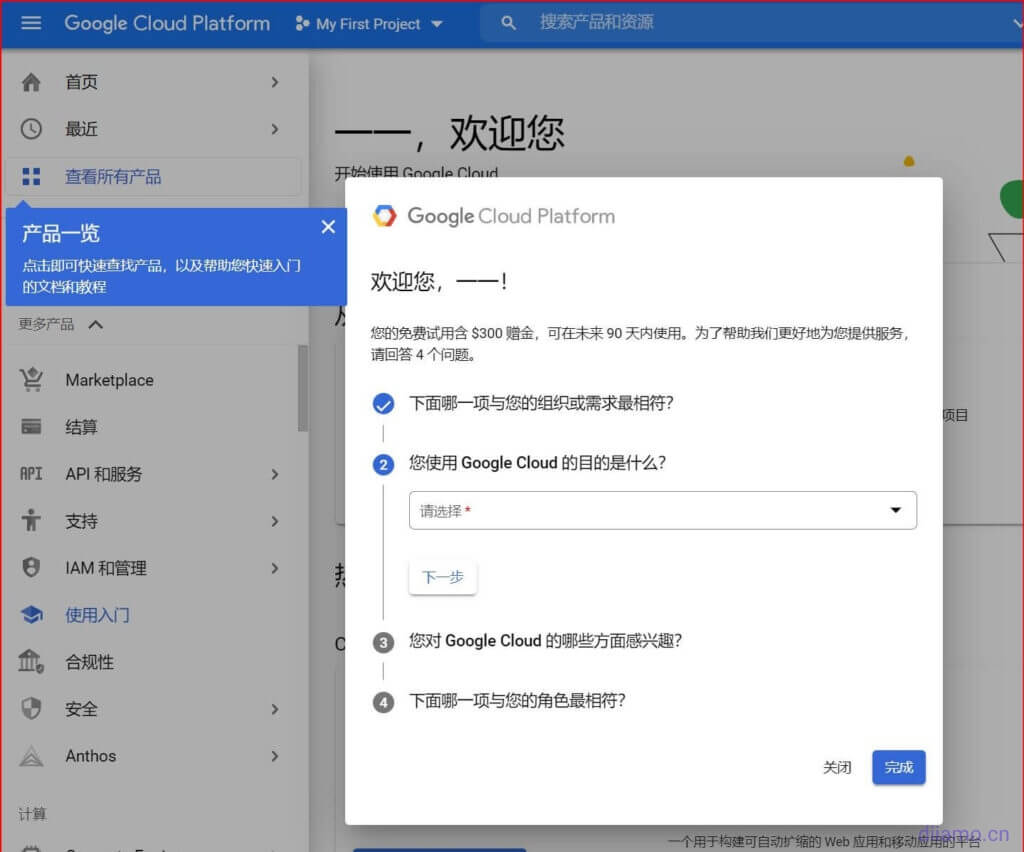
Your free trial contains $300 bonus for the next 90 days. You are now logged in to the Google Cloud operating platform interface. Before logging in, Google Cloud requires a small survey with 4 questions to be answered, but of course you can choose to close it.
Once the questions are answered, click Done. After that Google will recommend the corresponding solution based on your interest to host the website via Google Cloud.
You can try the solution or click below to skip it for now. Well here the Google Cloud application is done, get $300 grant and 90 days trial.
Google Cloud Google Cloud has been applied for and the next step is to start configuring Google Cloud.
Sign up for the free Google Translate API
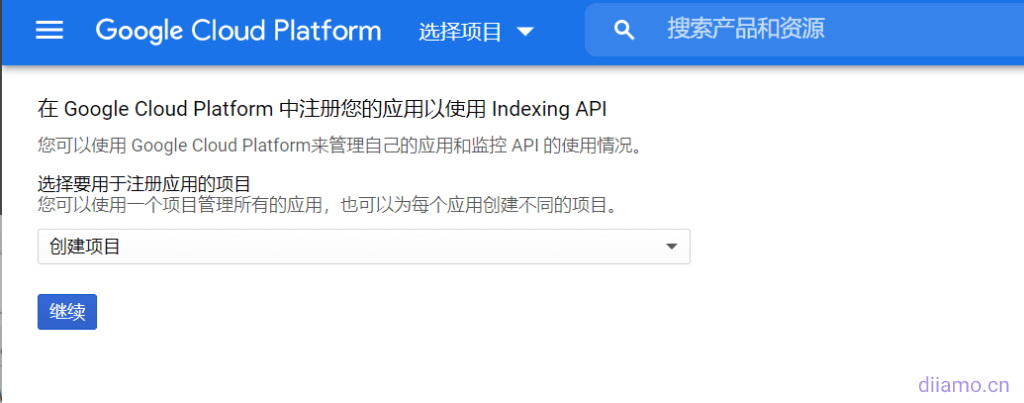
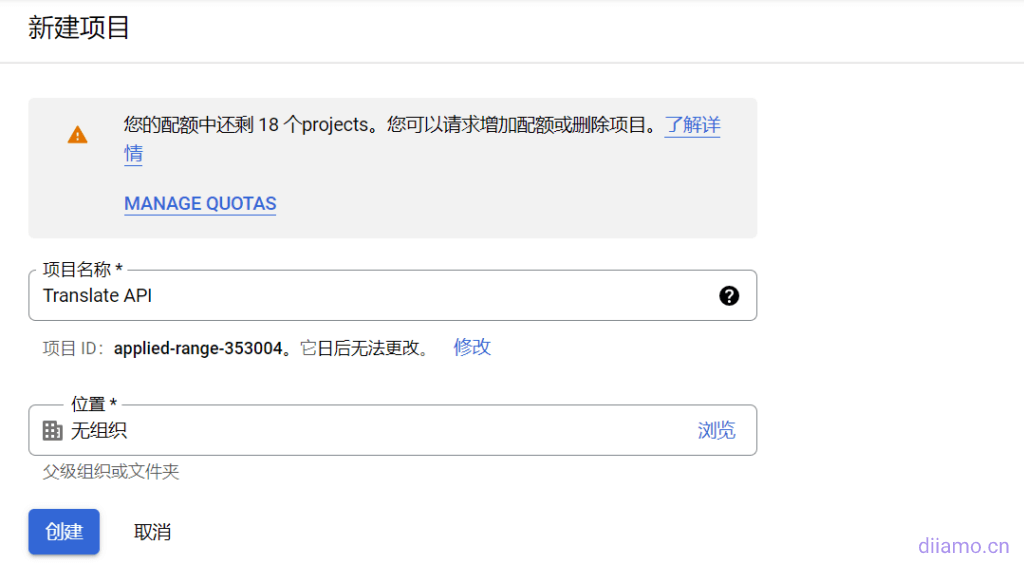
First you need to create a new Translate API project by clicking on Select Project and selecting "Create Project". Then clickproceed withThe
If, after clicking Continue(math.) genusYou will see the following screen, after entering your project name, click on theestablish::
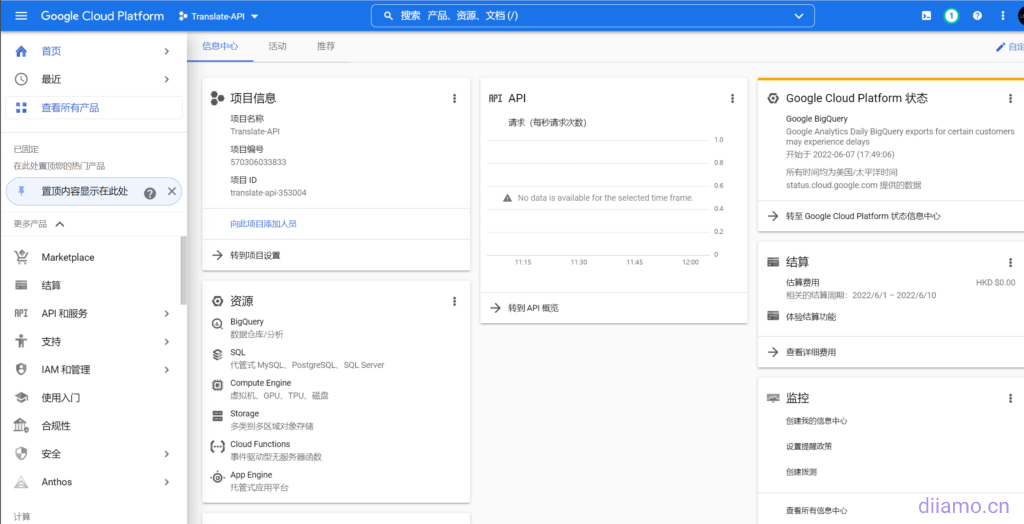
After successful creation, you will be taken to the page for the project.
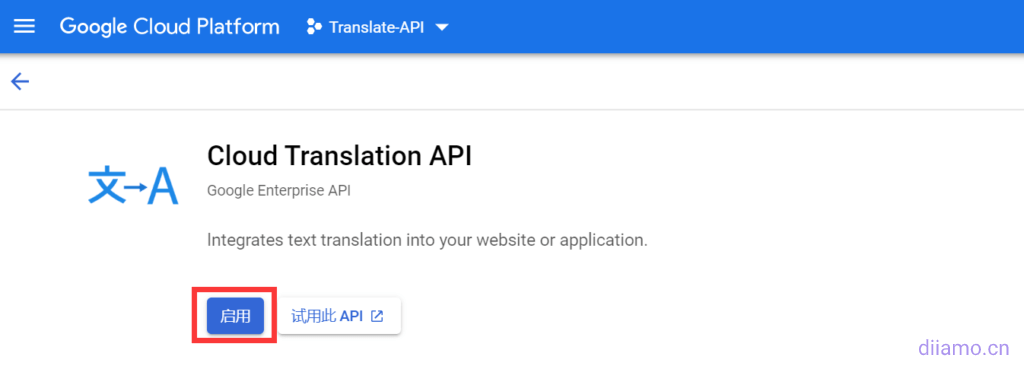
interviewsGoogle Translate API pageThen click on "start using", i.e., enable the Google Translate API under the project you created earlier.
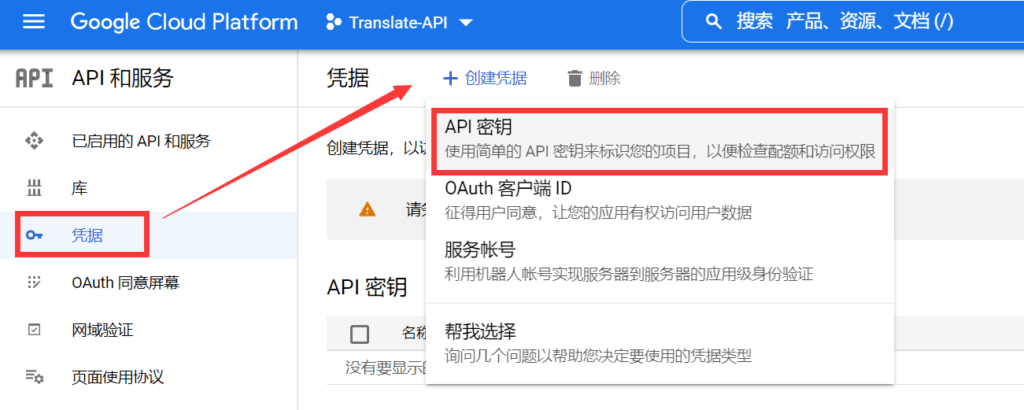
After enabling the Cloud Translation API, go to the API management page and click on "credential"-"Creating Credentials", select the API key as shown below:
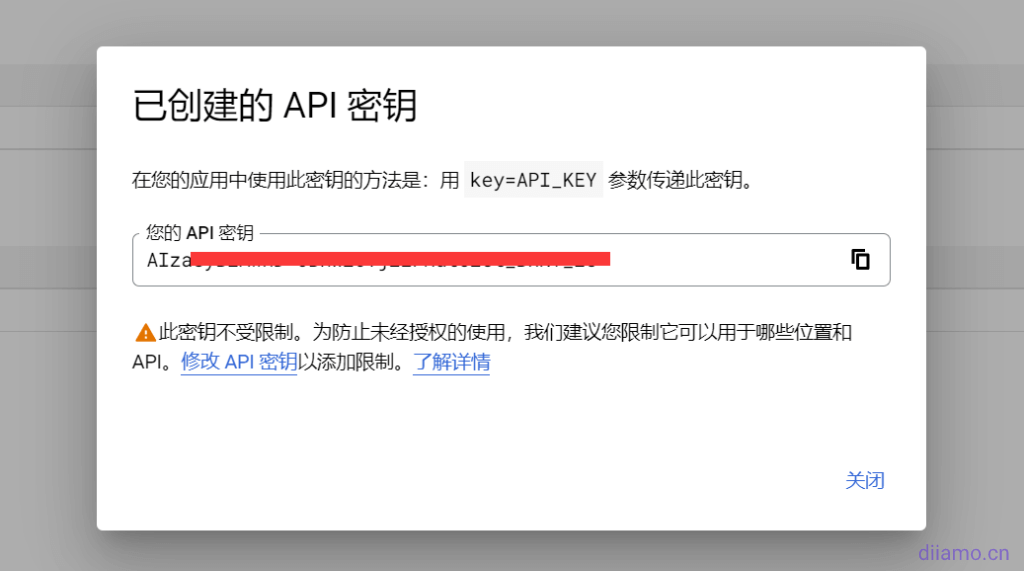
The API key for Google Cloud Translate has been successfully created when you see the following pop-up window.Save the API keyI'll need to use it later.
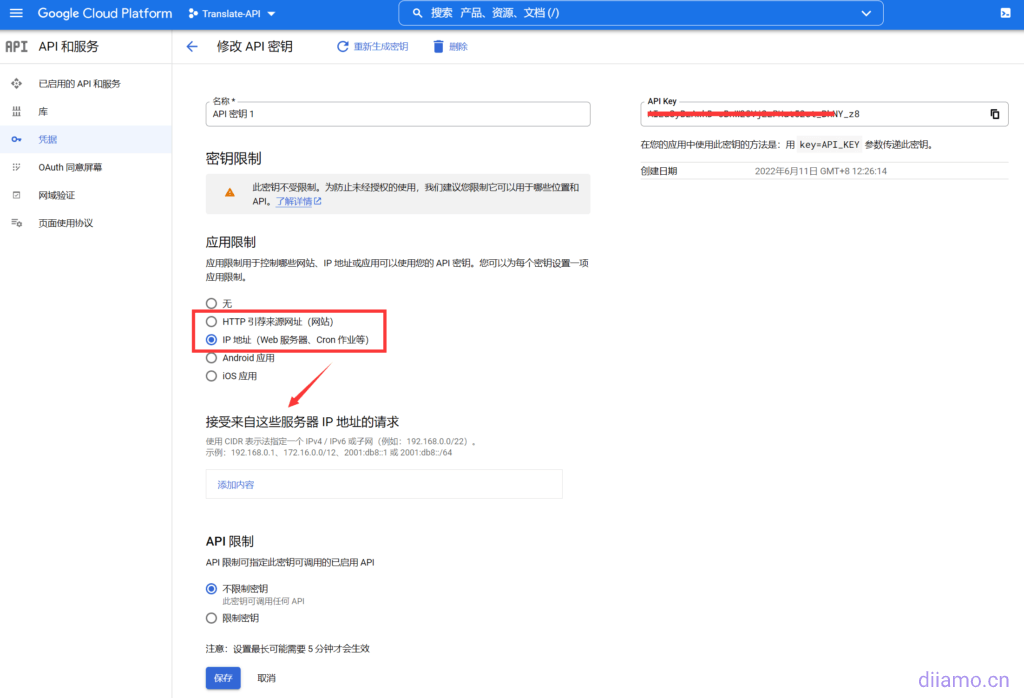
You can use this API key directly to configure the Magicpost plugin for post translation, but we recommend that you modify the API key slightly to add restrictions and improve security as suggested by Google.
To perform this action, click on the above screenshot of the "Modify API key ", selectHTTP referral source URLThen add the website sites that need to use this API, the URL format must be the full format, such as https://diiamo.cn/, if your URL has www add www.
Finally click "save (a file etc) (computing)".
Setting API translation quotas/limits
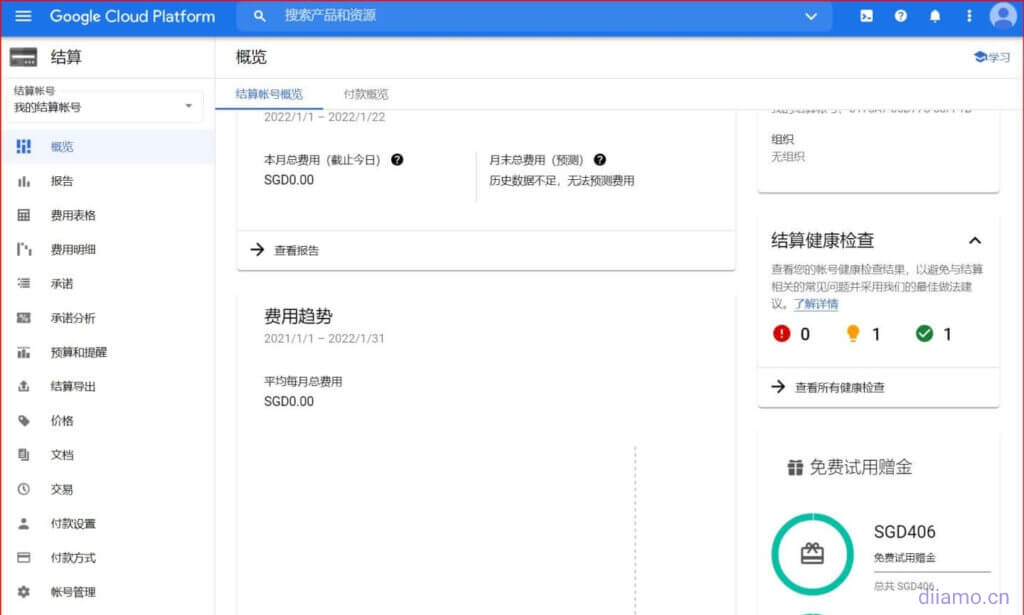
Now (2022-12-03) new users register for the first 3 months free (registration process is prompted), can be 3 months later each month before the first 500,000 translated characters free of charge, more than every 1 million characters after the charge of $20, click on theView Billing Rates. And the first 3 months are not free if you are an old subscriber.
A Chinese character = 2 characters, an English letter = 1 character (e.g. apple word counts as 5 characters), a space also counts as a character. If the English website is assumed to have 5 languages, 500,000 characters can be allocated to each language 100,000 characters, according to a letter is equal to a character to calculate, less than 10 long articles will run out of quota, it is easy to exceed the quota to be deducted.
A customer bought from our website in DecemberTranslatePress Translation Plugin, when discussing the free API with me, he told me that he had been charged for using Google Translate API beyond the limit before, and sent the following picture ↓ to me. Because I forgot to set the limit and spending reminder, I didn't realize the overage until I was charged $58 😆 .

Another visitor feedback he was deducted over $100 Google Translate costs ↓.
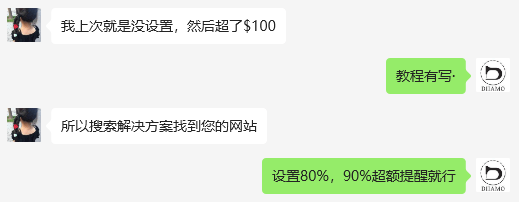
It is very necessary to set translation quota and overrun reminder, follow the steps below to set translation quota. Note: Setting quota can only limit the amount of characters to be translated per day at most, you can't set a monthly quota, and after exceeding the quota, it will be translated automatically the next day, which is actually rather useless. Setting consumption reminder is the most useful.
interviewsGoogle API and Services PageGo toEnabled APIs and services / Enabled APIs and services The
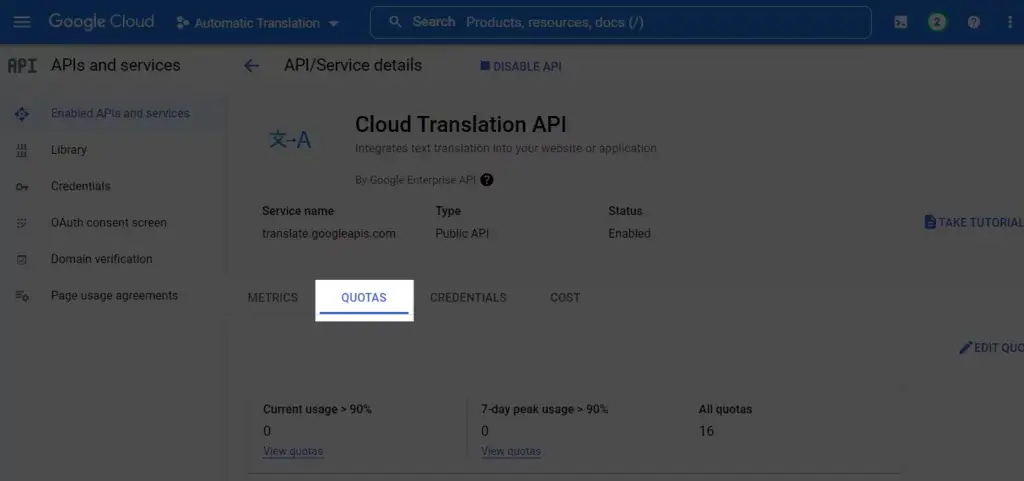
Scroll down the page, find and click on theCloud Translation APIThe

Select "ration"QUOTAS tab.
There are many quotas displayed below, select "v2 and v3 general model characters per day" and click on the top right corner. ![]() "EDIT QUOTAS/ Modify Quotas" Edit.
"EDIT QUOTAS/ Modify Quotas" Edit.

Enter the number of characters in New Limit, after exceeding this number, it will not be translated automatically. For free accounts, you get 500,000 free characters per month, here I enter 450,000 (four hundred and fifty thousand), after this number is exceeded, there will be no automatic translation on the same day, and it will be restored on the next day.

Tap OK↓.

Prompts that the update has been completed.

Setting up consumption reminders
Double Coverage also has to set up an overage alert, which is to set an amount and if you spend more than that you will be sent an email to remind you. This way you know how much was spent and stop the loss in time. That's what's most useful.
Click to enterGoogle ClearinghouseLog in and click on "My Billing Account".

Click on "Budgets and Reminders"

Create a budget↓

Follow the diagram ↓

Enter budget amount

Set the reminder threshold and tap Done.

Email alerts are sent when spending reaches $0.5, $0.9, or $1.Remember to check your mail oftenThe budget amount can be set a little more, for example, 100 dollars! The budget amount can be set a little more, for example, $100, and then the reminder threshold is set to 10%, 20%, 50%, when the consumption amount reaches $10, $20, $50 will be sent to remind the email respectively.
Enter the API into TranslatePress for fully automated translation of websites
Click on the "Settings" button under "Translate Site" on the top bar of the backend website.TranslatePressTranslation Settings screen.

Select "Automatic Translation" tab, enable automatic translation select "Yes", select "Google Translate v2", in the "Google Translate API key In the "Google Translate API Key" field, fill in the Google Translate API that you registered above.

Select Block Crawlers and do not check Automatically translate Slugs (URLs)! Translating URLs can lead to many errors.

Tap Save Changes
![]()
If the auto-translate settings screen shows unsupported languages, just click "Recheck supported languages" to check. This is very important, if you don't recheck, the website will not be automatically translated.

After saving, if the API is correct, it will show the green mark in the red box in the figure below, if it indicates an API error, click "Test API credentials" to see what is wrong with the API and then correct it yourself.

It takes a while for the translation to be completed after filling in the API, and the length of time depends on the total amount of text on the site, which can vary from a few minutes to a few hours.


